Physical Education Lesson Plan
S: PE
T: Overhand Throwing
O: K: To practice correct form while throwing overhand.
1st: To practice hitting objects while throwing overhand using correct form.
P: Teacher explanation and demonstration.
1. Overhand Throwing
You should step forward with the foot opposite of your throwing hand. The amount of force you use relates to the distance you throw. Hold the ball with your thumb, index finger, and middle finger. The ball should be by your ear when you start your throw. Keep your elbow as high as your shoulder, even during your unwind. As you throw, point your elbow toward your partner and then snap your elbow and wrist as you let go of the ball. Your arm should follow through across your body after you let go of the ball.
2. Bowling Pins and Yarn Balls
Each student will get one bowling pin and one yarn ball. The bowling pin is set near a wall. The students should go about 10 steps away from the bowling pin. From that spot they practice throwing and trying to knock the bowling pins over.
3. Frisbees and Bean Bags
Each student will get one Frisbee and one bean bag. Lean the Frisbee up against the wall. The students should go about 10 steps away from the Frisbee. From that spot they practice throwing and trying to knock over the Frisbee.
4. Clean up the Environment
Playing area: Grassy field, blacktop, or gymnasium
Players: Entire class
Equipment: One spongy Nerf ball for each student (20-32 balls that should be the same size of a baseball or softball)
Skill: Overhand throwing
Divide the class in half for two teams. The preset boundary should be about the size of a basketball court. I have played this in the field using cones to show the middle divider. I have also played this on an outdoor volleyball court using the net (at tennis height) to show the middle.
One team is on one side, the other team on the other side. Their side is their town or community. Each student has one ball. The balls are to represent trash or litter. No one wants trash in their town.
When a teacher says “go”, all students start throwing trash over the middle boundary. All throws should be overhand throwing. Any “trash” they find, they need to pick up and throw over the divider as fast a possible. They are only to throw one ball at a time.
When the teacher blows the whistle, everyone should freeze. No one should throw any more balls. Each team gets together in a circle and counts how many pieces of “trash” their team has. Whoever has the most loses. The losing team should do 15 jumping jacks. Then start over again.
Tuesday, January 31, 2012
Monday, January 30, 2012
Badminton
Physical Education Lesson Plan
S: Physical Education
T: Badminton
O: 2nd grade – To learn about badminton. To practice hand-eye coordination.
3rd grade – To introduce the students to the game of badminton. To learn the correct grip to hold a badminton racket. To practice the underhand serve.
4th grade – To introduce the game of badminton and to help students practice and improve hitting a small object with a long-handled implement.
5th grade – To introduce and practice the underhand and “flying pan” serve. To teach students how to do overhand, underhand and sidearm hits.
P: Teacher explanation and demonstration.
1) Students will be spread out around the outside of the gym floor. Students will practice the underhand serve by serving to a wall. Students will be each using a racket and birdie.
2) Students will practice the “flying pan” serve individually while spread out as above.
3) Students will be divided into partners. They should use one racket and one birdie between the two of them. One partner shall toss/throw the birdie to their partner so it will come to them below their waist. The other partner will hit the birdie using the underhand hit. Do that 5 times one direction and then have the partners trade racket and birdie.
4) Same as above, but now when the students make the toss/throw they should do it so the birdie goes over their partner’s head. The student hitting the birdie should now be using the overhand hit. Do that 5 times and then trade.
5) Using a serve, underhand and overhand hits, have partners try to keep the birdie going back and forth between them without it touching the floor.
Monday, January 23, 2012
Bean Bags
Physical Education Lesson Plan
S: Physical Education
T: Bean bags
O: Kindergarten – To practice hand-eye coordination. To practice timing and balance.
1st grade – To practice throwing and catching skills at different heights.
2nd grade – To exercise and have fun with bean bags while improving hand-eye coordination skills.
P: Teacher led demonstration and explanation.
Bean Bags
Each student has their own bean bag and are in their own self space.
1) With left hand behind their back, toss and catch with right hand only.
2) With right hand behind their back, toss and catch with left hand only.
3) Toss with right hand catch with left, toss with left and catch with right.
4) Make a rainbow by tossing with right hand up and over body and catching with left. And left to right.
5) Put one knee on the ground, toss and catch.
6) With both knees on the ground toss and catch.
7) Sit on you r bottoms, toss and catch.
8) Lie on your backs, toss and catch. (Which is easier to toss and catch, standing or lying? Standing—more range of motion.
9) Toss at a high level (standing) and catch it at a medium level (kneeling).
10) Toss at a medium level and catch at a high level.
11) Toss at a high level and catch at a low level (sitting).
12) Toss at a low level and catch at a high level.
13) Balance on one foot, toss and catch. Other foot.
14) Close one eye, toss and catch.
15) Close both eyes, toss and catch. Students should be tossing at an easy, low height.
16) Toss bean bag, turn around in a full circle and catch.
17) Toss bean bag, touch head and catch. Toss bean bag, touch head and shoulders and catch. Toss bean bag, touch head, shoulders and knees and catch. Toss bean bag, touch head, shoulders, knees and toes and catch.
18) Toss the bean bag from the front of your body and catch it behind you.
19) Toss the bean bag from the back of your body and catch it in front of you.
20) Toss the bean bag and catch it above your head. Catch it at your waist. Catch it right before it touches the ground.
21) Toss the bean bag and jump up and catch it above your head. (Relate this to rebounding a basketball.)
22) Toss it up and clap once and catch. Clap twice, three times. How many times can you clap before you catch the bean bag?
23) Toss your bean bag and catch it without making any noise. Talk to them about giving as they catch.
24) Place the bean bag between your ankles, jump up and catch the bean bag.
25) Place the bean bag on your head and tilt your head backward and catch the bean nag in your hands.
26) Place the bean bag on your head. Pretend you are sitting in a chair, tilt your head forward and catch the bean bag between your knees.
27) Each student gets a Frisbee and a bean bag. Lean the Frisbee against a wall, take 3 giant steps backward and try to throw the bean bag and knock the Frisbee over. Then take 6 giant steps back, etc.
Partner Activities
1) Toss and catch one bean bag back and forth with a partner.
2) Toss and catch where both of you have a bean bag and you toss them at the same time.
3) One partner holds the bean bag higher than their partner’s head. The other partner holds their hand open with their palms facing each other. The partner drops the bean bag and you have to time it correctly and slap your hands together and catch the bean bag.
4) One Step – You will have two lines, students will be side by side. In the one line will be one partner, in the other line will be their partner facing them, across from them. You can play this game with the partners having one bean bag between the two of them or two bean bags between the two of them. When the teacher says “toss”, everyone tosses the bean bags. If they catch one (or two if they are playing with two) then they step back one step. Teacher will say “toss” and everyone will toss. If you miss, you go back to the start lines. If they both catch their bean bags then they step back.
Relay Races (Make 4-6 lines with 5 to 8 in a line.)
1) Place the bean bag on your head and walk or run to the half court line of a basketball court and turn around and walk or run back. If the bean bag falls off your head, you must stop, put the bean bag back on your head, get your hands away, and start your movement again. When you get back the next student in line goes.
2) Place the bean bag on your elbow. Do not bend your arm and hold on to the bean bag. It lays on your elbow.
3) Place the bean bag on your shoulder.
4) Place the bean bag between your knees.
5) Place the bean bag on the top of your shoe in the toe area.
6) Place the bean bag on your knee. You will need to hop.
7) Hot Potato – Run down to the end of the basketball court and back. Every time the bean bag touches you, you have to toss it again. The students may do high, long tosses or short, low tosses. Either one is okay.
Whole Class Activity
1) Freeze Tag – The bean bag should be on a certain body part (head, shoulder, elbow, etc.). The person or persons who are “it” can pick their bean bags up when they fall, but if anyone else’s bean bag falls, they are frozen until someone comes and picks it up for them.. Or if the person who is “it” tags them, they are frozen until someone unfreezes them. The person who is “it” can not tag someone without the bean bag being on their head, etc.
Sunday, January 22, 2012
Best Deal Magazines
Best Deal Magazines - $4.69 Magazine Subscriptions
This is an awesome offer for bargain hunters. Best Deal Magazines offers 100+ magazines for just $4.69 for each 1 year subscription. Order for yourself, family, friends and business associates. All you pay is $4.69 for each 1 year subscription. Order as many as you like - the total potential savings is approximately $1,000. This offer is valid on new, gift and renewal subscriptions. In addition, unlike many other magazine websites, Best Deal Magazines does NOT automatically renew you at a higher rate after your subscription term is finished. To clear up any potential confusion, make sure you choose from the "$4.69 Subscriptions" category. In addition to the great $4.69 offer, Best Deal Magazines also offers 900+ magazine subscriptions at savings up to 95% off the cover price. Check it out at BEST DEAL MAGAZINES
This is an awesome offer for bargain hunters. Best Deal Magazines offers 100+ magazines for just $4.69 for each 1 year subscription. Order for yourself, family, friends and business associates. All you pay is $4.69 for each 1 year subscription. Order as many as you like - the total potential savings is approximately $1,000. This offer is valid on new, gift and renewal subscriptions. In addition, unlike many other magazine websites, Best Deal Magazines does NOT automatically renew you at a higher rate after your subscription term is finished. To clear up any potential confusion, make sure you choose from the "$4.69 Subscriptions" category. In addition to the great $4.69 offer, Best Deal Magazines also offers 900+ magazine subscriptions at savings up to 95% off the cover price. Check it out at BEST DEAL MAGAZINES
Saturday, January 21, 2012
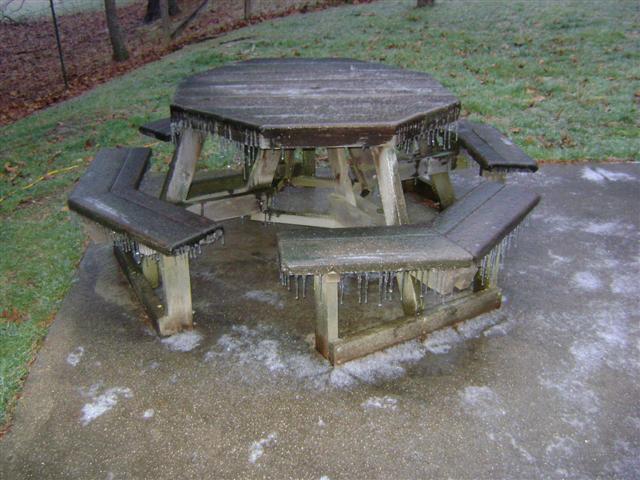
Ice Storm
We had freezing rain most of the night. Here is an early morning view from the front step looking towards the driveway. The icy pine trees are illuminated by the street light.

The pool pump and lines are covered in ice...

As is the picnic table...

And the pool slide...


The last picture is looking up the fence line into the woods.


The pool pump and lines are covered in ice...

As is the picnic table...
And the pool slide...


The last picture is looking up the fence line into the woods.

Tuesday, January 17, 2012
Gmail Team :: Information needed.....
Back on December 28th, I received an obvious spam email from the "Gmail Team." I marked it as spam and, since then, have seen several variants appear in my Spam folder.
Today I received another that was not marked as spam...
From: Gmail Team infocustomerservice.retrieve@gmail.com
To: account@google.com
Bcc: {my email address}
Subject: Information needed.....
Due to the congestion of all users of Google Mail, the server encountered some errors.
In an effort to protect your privacy and keep your information secure.
Kindly complete the fields below to avoid Denial of service.
Full Name* :
Date of Birth* :
e-mail account*:
Current Password* :
Thank you for your cooperation,
©2012 Google Mail ®.
Once again, I have reported the email as a phishing attack.
Saturday, January 14, 2012
Shaping Up
Physical Education Lesson Plan
S: PE
T: Shaping Up
O: K: To teach movement vocabulary associated with health-related fitness.
1st: To strengthen various muscles by doing body movements.
2nd: To improve cardiovascular efficiency by repeated body movements. To improve overall fitness.
P: Teacher explanation and demonstration.
Shaping Up
Form a rectangle, square, triangle, and circle using cones. Utilize the length and width of the gym. Use directional polyspots from one cone to the next if needed.
 Place one locomotor movement card on each cone.
Students will be assigned to one of the geometric shapes. They will travel from one cone to the next performing the locomotor movement on the cone until they get to the next cone. Then they will change the locomotor movement to what is on the next card.
The students are to do each geometric shape three times and then rest.
When all students are ready, they will be assigned to a new geometric shape and start performing new locomotor movements.
Sunday, January 08, 2012
Gymnastics / Mats #1
Physcial Education Lesson Plan
S: Physical Education
T: Gymnastics/Mats #1
O: Kindergarten – To help students try unusual movements with their bodies. To feel comfortable as they practice weight change, rhythm and timing as they move down the mats.
1st grade – To introduce gymnastics in a non-threatening way to help students become more flexible. To improve rhythm.
2nd grade – To help students improve their coordination and body control as they transfer weight from hands to feet, etc.
P: Teacher explanation and demonstration.
I start out with Animal Movements or Body Movements. I place two mats end to end and have three different waiting lines. I have them to do the skill down the mats and then stand up and walk off the mats back to the end of the line.
1) Puppy Dog Run – Students place hands and feet on the floor, bending knees and elbows and move down the mats in a happy puppy fashion.
2) Bear Walk – Bend forward with hands and feet on the mats. Bend knees as little as possible. Move forward slowly by moving the hand and foot on the same side together. (If they start with their right hand then their right foot should move at the same time.)
3) Rabbit Jump – Crouch down and place hands and feet on the mats. Move forward by moving both hands out in front and then bringing both feet up to the hands. It is a hands, feet movement. When the hands go, the feet don’t and when the feet go, the hands don’t.
4) Lame Dog Walk – Walk on both hands but only one foot. The other foot should be held up as injured. This is a hopping type of movement.
5) Crab Walk – Squat down with your back to the mats and reach back with both hands on the floor. Your bottom should not be touching the mats. Move backward using hands and feet.
6) Seal Walk – Laying straight and flat on your front side, using your arms, push your chest up off the mat. You then move forward, using only your arms. You will be pulling/dragging your legs.
7) Inchworm Crawl – Get into a push-up position. Without moving your hands, you inch by inch walk your feet as close to your hands as you can. Your legs should be kept completely straight. When your leg muscles start to fell stretched as far as they can go, then you do not move your feet, but now you move your hands forward until you are in a push-up position again. Keep hands planted and move feet, keep feet planted and move hands. This is a very slow process when done correctly.
8) Frog Jump – Unlike the Rabbit Jump where the hands and feet moved at different times, this jump is done where the hands and feet move and jump at the same time. Students should spring/jump down the mat.
9) Cricket Walk – Squat down with knees spread apart. Arms should go in between the legs and wrap around the outside of your ankles. Hands should be held on your ankles while you walk. Students need to bend at the knees and waist. Their bottoms should be down low.
10) Log Roll – Students should lie straight across the beginning of the mat. Their bodies should be completely straight. Their arms should be straight above their heads. Their legs should be straight and kept tight together. They roll, like a log, down the mat, trying to stay straight.
11) Egg Roll – The students should be sideways to the mat. They should squat into a tight ball, wrapping their arms around their knees. They are to roll sideways down the mat. They will look like wobbly eggs.
12) Siamese Twin Walk – Stand back to back with a partner. They should hook their elbows. With one partner leading on the way down the mat and the other partner leading on the way back, they should try to walk together.
13) Wheelbarrow – Students need to be with a partner. One student will be holding their weight on their hands while the other student is holding their partners ankles. The student with their hands on the mat should have their legs straight. The front student walks on the hands while the other student follows holding their legs. Then they need to switch positions.
Saturday, January 07, 2012
Chiller replacement - 11
On Thursday, the dry cooler was set into place on the lower roof:


Also, the old condensors were removed from the upper roof and replaced by the new condensor units:


Yesterday the chiller was moved from the entrance to the mechanical room to it's final location:
With the chiller in place, the temporary platform/ramp was removed and the door replaced:


Also, the old condensors were removed from the upper roof and replaced by the new condensor units:


Yesterday the chiller was moved from the entrance to the mechanical room to it's final location:
With the chiller in place, the temporary platform/ramp was removed and the door replaced:


Thursday, January 05, 2012
Chiller replacement - 10
The first slideshow is for the crane setup. The crane was rented from Capital City Group in Columbus. It was a Link-Belt HTC-8690 -- a 90-ton hydraulic truck crane with a 140 foot main boom.
The second slideshow is for the crane lifts. The order of events:
The second slideshow is for the crane lifts. The order of events:
- Raising the two I-beams for the base of the dry cooler
- Raising the dry cooler to the lower roof
- Raising the new chiller and slidding it into the mechanical room
- Lowering the two old air-cooled condensors
- Raising the two new air-cooled condensors
Wednesday, January 04, 2012
Chiller replacement - 9
The tie-in of the new permanent lines for the temporary chiller was completed last week.

The old chillers, compressors, and piping have been removed. The concrete pad for the new chiller has been extended. The area is ready for the new equipment.

The parts piles have grown and include the signage for tomorrow's street closing due to the planned arrival of a crane and the new equipment.

A platform has been built through where the door from the penthouse to the lower roof used to be. The new chiller will be brought in through that opening.


Wind damage to roof
This past weekend, the Athens area was subject to high winds. On walking in to work this morning, I noticed that part of the new roof trim was loose and bent up slightly...


Tuesday, January 03, 2012
Chiller replacement - 8
Last week the temporary chiller was moved slightly, hooked up, and made operational. Here is a view from the building looking down into the alley:

The office ceiling through which the permanent pipes for the temporary chiller pass is shown next. The gray pipes can no longer be seen as they have been wrapped in a white-coated insulation.


The office ceiling through which the permanent pipes for the temporary chiller pass is shown next. The gray pipes can no longer be seen as they have been wrapped in a white-coated insulation.

Water leak at work
On returning from the New Year's holiday weekend, we found that there had been another water leak at work. A pump in the penthouse was leaking and water found its way through cracks in the concrete decking into the offices below. Three offices and a conference room all had water damage.
The worst hit of the three offices had one ceiling tile fall out from being saturated:

Unfortunately there was a computer below it...

The worst hit of the three offices had one ceiling tile fall out from being saturated:

Unfortunately there was a computer below it...

Bad Home Water Pressure Regulator
This morning I woke to the sound of running water. No one else was up so I was concerned about the source of the water.
Given the below freezing temperatures early this morning, my first thought was that a pipe had burst. I quickly got dressed and went outside to check the outdoor faucets thinking that I might have left a hose attached. But everything was OK outdoors - other than being extremely cold.
Searching indoors, I found a toilet that was not shutting off. I tried jiggling the lever with no luck. I then removed the lid from the tank and jiggled the float again with no luck. I decided to turn off the water to the toilet and deal with the problem later.
A short time later, I heard more running water. This time the noise was coming from the laundry room on the lower floor. Water was all over the floor and hot water was coming out of the pressure relief valve on the water heater. I tried jiggling the relief valve with no luck. I then manually opened the valve fully and closed it. The valve still leaked. With that failed attempt, I shut off the water to the hot water tank, called a plumber, and started cleaning up the water on the floor.
As my wife was leaving for work she commented that she thought the cold water pressure was higher than normal. I then found my water pressure gauge and screwed it on to the utility sink in the laundry room. I opened the cold water faucet and the gauge pegged at a pressure exceeding 100 psi!
Things were starting to make a little more sense. My thought now was that the toilet and hot water tank were probably OK and that the water pressure regulator had failed.
I called Sunday Creek Valley Water District to see if they were experiencing any pressure problems. The lady that answered the phone told me that they were having higher than normal pressure in the main lines and they were investigating.
By then the plumber arrived. He agreed that my pressure regulator had likely failed. He left briefly to get a new pressure regulator and then returned.
In fairly short order, he had removed the old pressure regulator and had installed the new one shown here:

With the new pressure regulator installed, the water pressure was 52 psi. Now this evening, I checked again and the pressure has dropped to 46 psi:

I'm guessing that the water company has reduced the pressure in the main water line - maybe even lower than normal.
Monday, January 02, 2012
Battleship
Physical Education Lesson Plan
S: PE
T: Battleship
O: K – To practice aiming and throwing
1st Grade – To practice teamwork
2nd Grade – To improve throwing and catching skills
P: Teacher explains and demonstrates the activity; divides the class into 4 or 5 teams.
Students are divided into 4 teams (5 teams for larger classes). Each team is assigned a red gym mat (the ship). All members except one from each team stands on the mat. One member from each team gets onto a scooter (a dingy or lifeboat). The teammate on the scooter retrieves nerfballs and throws them to their teammates to use as ammunition to fire at other ships.
Each team is trying to protect their bowling pins from being knocked over by using their hands to deflect the balls while at the same time trying to throw nerfballs to knock other teams’ bowling pins over.
When only one team is left with any pins standing, that team is the winner.
A different student is assigned the scooter, pins are reset, and the game is played again.
Subscribe to:
Posts (Atom)